Global Japanese Sushi Rolls
Highlighted under: Travel Food | Global Taste
I discovered the joy of making sushi rolls at home, and now I can't imagine my life without them. It’s a thrilling process, transforming simple ingredients into beautiful, flavorful bites that impress everyone. Experimenting with various fillings and condiments allows for endless creativity. My Global Japanese Sushi Rolls combine traditional techniques with unique flavors from around the world, ensuring a truly delightful sushi experience. Prepare to roll your way to culinary bliss with these easy-to-follow instructions!
My journey into sushi-making began during my travels in Japan, where I marveled at the art of sushi preparation. The precision of the chefs as they transformed fish and rice into culinary masterpieces captivated me. I brought back this passion and decided to blend Japanese tradition with global influences, creating a fusion of flavors. Each roll reflects my love for exploration, showcasing ingredients that are readily available and enjoyable for everyone.
One key tip I learned is that using the right kind of rice is crucial. Short-grain sushi rice gives the rolls the perfect stickiness, allowing them to hold together once rolled. This makes assembling a breeze and lets me focus more on the fun part: experimenting with fillings and dipping sauces!
Why You'll Love These Sushi Rolls
- A fun and interactive dish for gatherings and family meals
- Versatile combinations allow for creativity and personalization
- A colorful presentation that is as beautiful as it is delicious
Mastering Sushi Rice
The foundation of any great sushi roll is the sushi rice. Rinsing the rice thoroughly is crucial as it removes excess starch, leading to a fluffy texture. Aim to rinse until the water runs clear—this usually takes 3-4 cycles. For the best results, consider using a rice cooker, as it consistently produces perfectly cooked rice. After cooking, mixing in the rice vinegar, sugar, and salt is key. This not only seasons the rice but also gives it that characteristic glossy finish. Letting it cool down to room temperature is essential before assembling your rolls.
When preparing your sushi rice, pay attention to the ratio of water and rice. While 2 1/2 cups of water for 2 cups of rice is standard, this may vary slightly depending on your specific rice brand. After cooking, heat remains in the rice; thus, it's beneficial to use a wooden spatula to fold the seasoning in gently, promoting a light texture. Avoid over-mixing, which can make the rice mushy. The right firmness allows for easy rolling and maintains the overall structure of your sushi rolls.
Filling Variations
The versatility of fillings in sushi rolls is where the fun truly begins! While this recipe features smoked salmon and shrimp, you can easily customize with other ingredients. Consider using marinated tofu or even tempura vegetables for a plant-based option. For crunchy sweetness, try adding pickled carrots or bell peppers. The key is to balance flavors and textures, so aim for combinations that provide crunch alongside creaminess, like avocado paired with crab or even spicy tuna for a kick.
Texture plays a vital role in elevating your sushi experience. When selecting ingredients, think about how each filling contributes to the overall mouthfeel. For instance, creamy fillings like avocado enhance the contrast with crunchy items like cucumber. To take it a step further, consider incorporating different sauces or drizzles, such as a tangy sriracha mayo or a sweet soy glaze. These not only add unexpected flavor bursts but also make your sushi rolls visually stunning.
Rolling Perfect Sushi
The rolling technique is pivotal for achieving neat, compact sushi rolls. After spreading the rice on the nori, make sure to leave about an inch of nori at the top; this ensures proper sealing later. The rice should be spread evenly without being packed too tightly. When you're ready to roll, use your bamboo mat that allows for a gentle yet firm pressure, guiding the ingredients as you tuck them into the roll without squeezing too hard, which could cause the fillings to ooze out.
If you're new to rolling, don't worry if your first few attempts aren’t perfect. Common pitfalls include overfilling or not rolling tightly enough. A helpful tip is to practice with just rice initially, perfecting the rolling motion before adding fillings. If you find that your rolls are falling apart, it might be due to insufficient moisture in the nori. Lightly dampening the nori with water before assembling can create a better seal. Lastly, always use a sharp knife to slice your rolls; this prevents squishing and maintains a clean, attractive cut.
Ingredients
Gather these fresh ingredients for a delightful sushi-making experience:
Sushi Essentials
- 2 cups short-grain sushi rice
- 2 1/2 cups water
- 1/4 cup rice vinegar
- 1 tablespoon sugar
- 1 teaspoon salt
- Nori sheets
Global Fillings
- 1 avocado, sliced
- 1 cucumber, julienned
- 4 ounces smoked salmon
- 4 ounces cooked shrimp
- Sesame seeds for garnish
- Soy sauce for serving
Ensure all your ingredients are fresh for the best flavor!
Instructions
Follow these steps to roll your own sushi:
Prepare the Rice
Rinse the sushi rice in cold water until the water runs clear, then combine it with the measured water in a rice cooker. Cook according to the rice cooker instructions. Once done, transfer the rice to a bowl and mix with rice vinegar, sugar, and salt. Allow it to cool.
Assemble the Roll
Lay a sheet of nori, shiny side down, on a bamboo rolling mat. Wet your hands to avoid stickiness and spread a thin layer of sushi rice over the nori, leaving a gap at the top. Place your choice of fillings horizontally across the rice.
Roll it Up
Using the bamboo mat, start rolling the sushi away from you, tucking it tightly as you go. Use a bit of water to seal the edge of the nori when you finish rolling. Slice the sushi rolls into bite-sized pieces with a sharp knife.
Serve and Enjoy
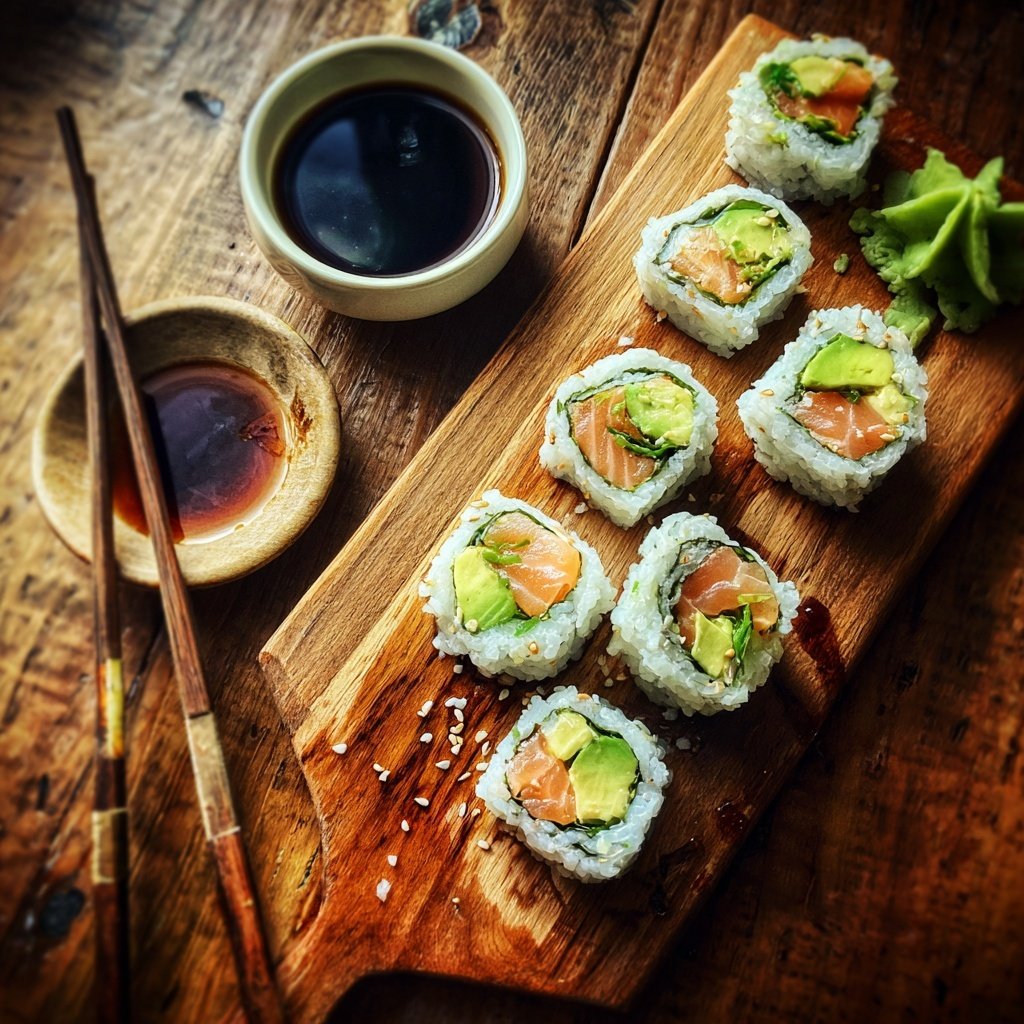
Arrange your sushi rolls on a platter, sprinkle with sesame seeds, and serve with soy sauce for dipping.
Enjoy your homemade sushi rolls and impress your friends!
Pro Tips
- Experiment with fillings like cream cheese or mango for a unique twist. Always use fresh ingredients, and feel free to play around with dipping sauces for added flavor.
Make-Ahead Sushi
If you're planning a gathering, sushi rolls can be prepared in advance, making them an excellent choice for meal prepping. To keep the sushi fresh, assemble the rolls with fillings that have a longer shelf life, like smoked salmon or pickled veggies, rather than fresh ingredients. Once rolled, wrap each sushi roll tightly in plastic wrap to prevent them from drying out, and store them in the refrigerator. They are best enjoyed within 24 hours for optimal flavor and texture.
While the individual components can be prepped ahead of time, it's best to roll the sushi shortly before serving in order to maintain the integrity of the rice and nori. If you find your rice has dried out slightly during chilling, spritz it with a bit of water to rehydrate before assembling. This will also help in sealing the rolls better when you’re wrapping them up.
Serving Suggestions
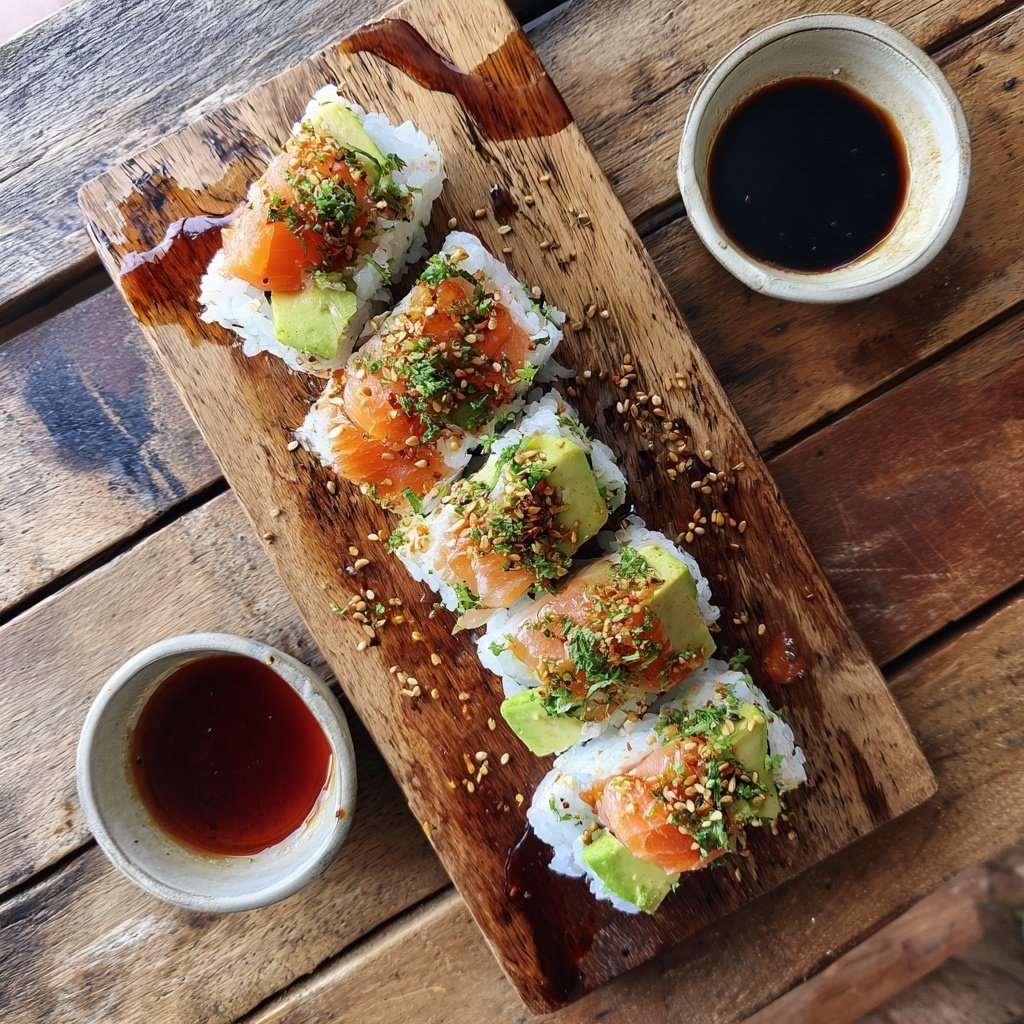
Presentation is key in sushi, and arranging your rolls on a platter can be as creative as the rolls themselves. Try using a variety of garnishes such as pickled ginger, wasabi, and colorful sliced vegetables to create an inviting spread. You can also serve your rolls with small bowls of soy sauce or alternative dipping sauces for a taste twist. For those who enjoy a bit of heat, a drizzle of spicy mayo over the top adds an enticing visual element.
Consider pairing your sushi rolls with a light salad or miso soup for a complete meal. A simple cucumber salad dressed with rice vinegar can complement the flavors of the rolls beautifully. If you want to impress your guests further, set up a sushi rolling station where everyone can customize their own rolls with their choice of ingredients—this interactive experience not only makes it enjoyable but also allows for personal preferences to shine.
Questions About Recipes
→ Can I use brown rice instead of sushi rice?
Yes, but brown rice will change the texture and flavor of the sushi.
→ How do I store leftover sushi?
Wrap it tightly in plastic wrap and store in the refrigerator for up to 24 hours.
→ What other fillings can I use?
Try adding roasted vegetables, tofu, or different types of fish!
→ Is sushi safe to eat during pregnancy?
It's best to avoid raw fish sushi and opt for cooked fillings to ensure safety.
Global Japanese Sushi Rolls
Created by: The Chefmatttastes Team
Recipe Type: Travel Food | Global Taste
Skill Level: Intermediate
Final Quantity: 4 rolls
What You'll Need
Sushi Essentials
- 2 cups short-grain sushi rice
- 2 1/2 cups water
- 1/4 cup rice vinegar
- 1 tablespoon sugar
- 1 teaspoon salt
- Nori sheets
Global Fillings
- 1 avocado, sliced
- 1 cucumber, julienned
- 4 ounces smoked salmon
- 4 ounces cooked shrimp
- Sesame seeds for garnish
- Soy sauce for serving
How-To Steps
Rinse the sushi rice in cold water until the water runs clear, then combine it with the measured water in a rice cooker. Cook according to the rice cooker instructions. Once done, transfer the rice to a bowl and mix with rice vinegar, sugar, and salt. Allow it to cool.
Lay a sheet of nori, shiny side down, on a bamboo rolling mat. Wet your hands to avoid stickiness and spread a thin layer of sushi rice over the nori, leaving a gap at the top. Place your choice of fillings horizontally across the rice.
Using the bamboo mat, start rolling the sushi away from you, tucking it tightly as you go. Use a bit of water to seal the edge of the nori when you finish rolling. Slice the sushi rolls into bite-sized pieces with a sharp knife.
Arrange your sushi rolls on a platter, sprinkle with sesame seeds, and serve with soy sauce for dipping.
Extra Tips
- Experiment with fillings like cream cheese or mango for a unique twist. Always use fresh ingredients, and feel free to play around with dipping sauces for added flavor.
Nutritional Breakdown (Per Serving)
- Calories: 250 kcal
- Total Fat: 7g
- Saturated Fat: 1g
- Cholesterol: 20mg
- Sodium: 305mg
- Total Carbohydrates: 38g
- Dietary Fiber: 3g
- Sugars: 1g
- Protein: 9g